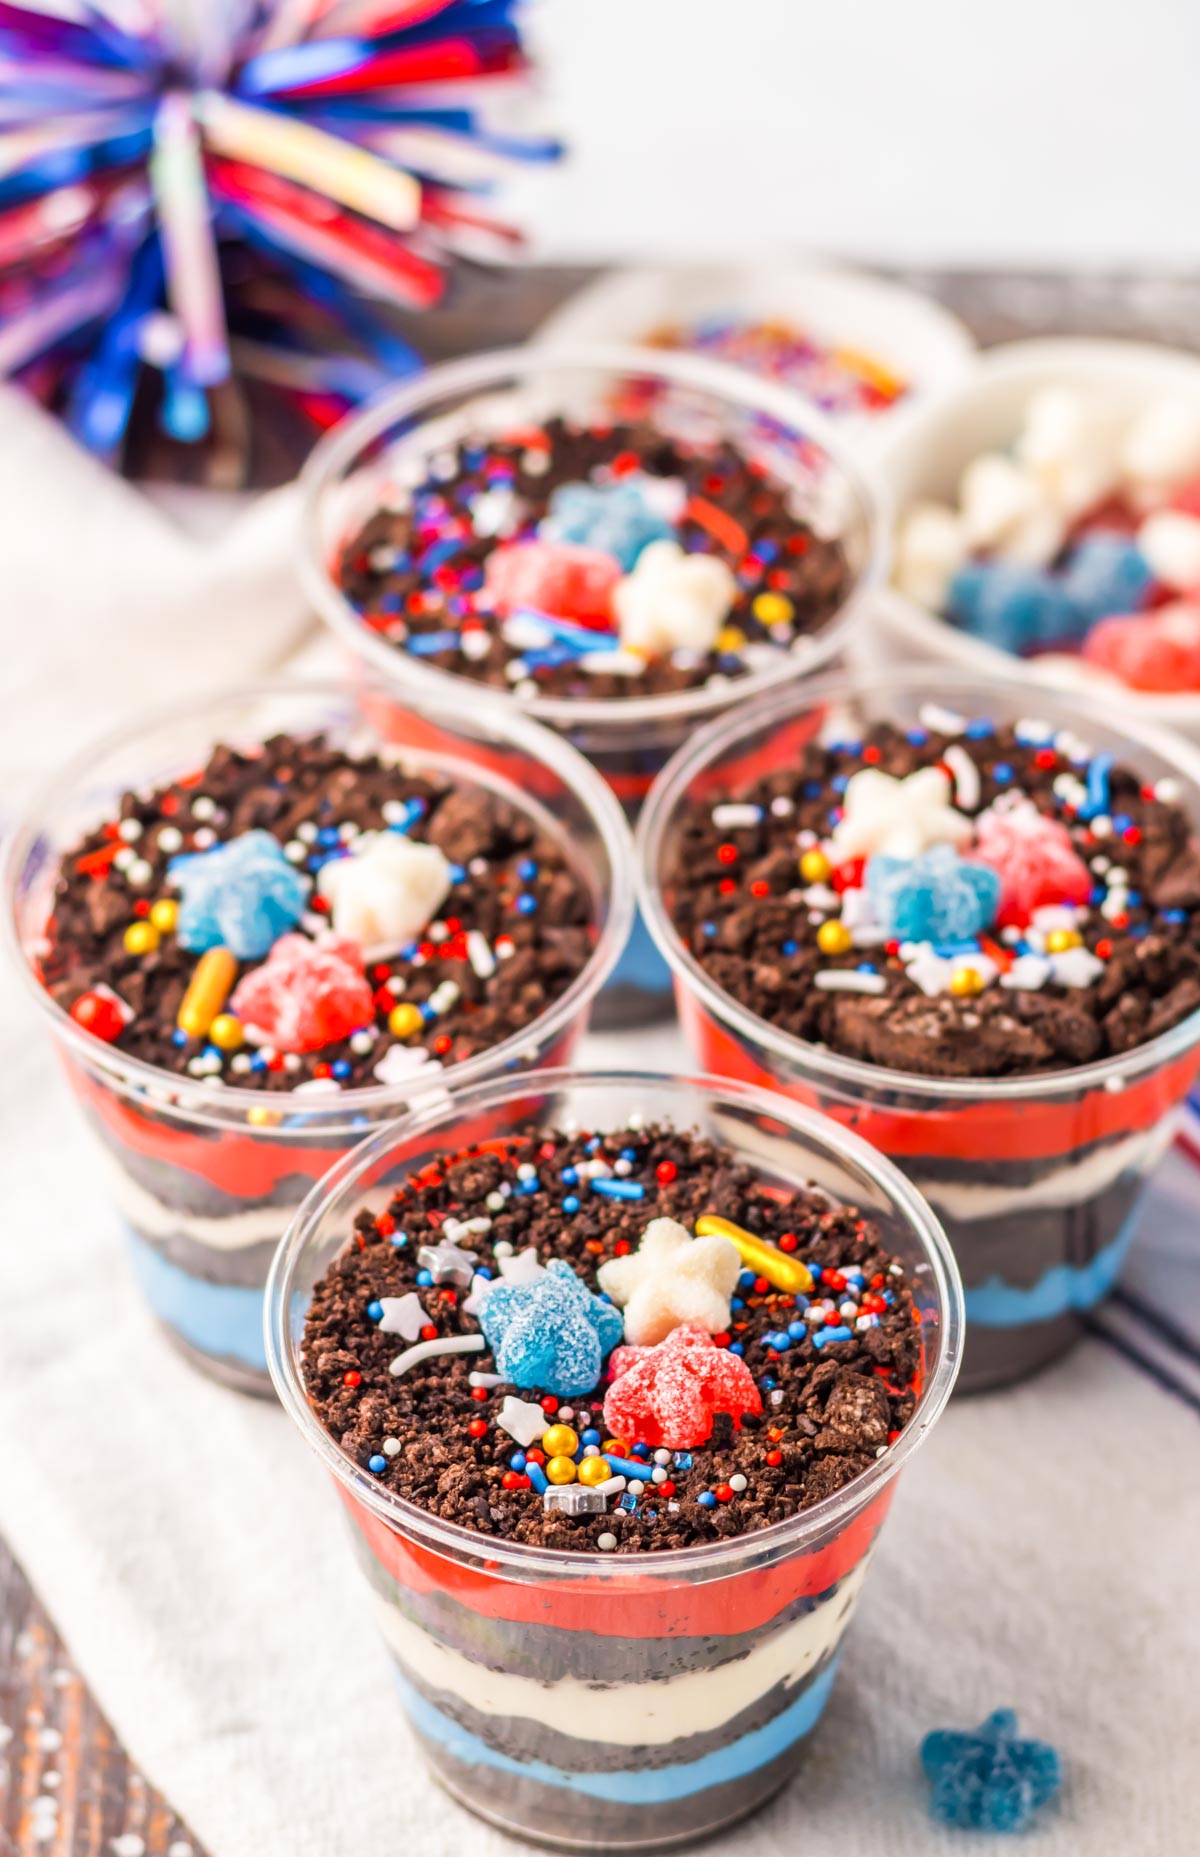
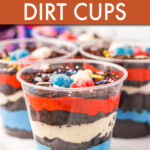
Quick and Easy Dirt Cups
Quick and easy dirt cups are a fun, creative, no-bake treat that kids love! With extra patriotic flair, they’re perfect for serving on Memorial Day and the 4th of July.
Suitable for vegetarian diets.

Want to save this Recipe?
Enter your email below and get it sent straight to your inbox. Along with recipes & tips every week!
Dirt Cups are a favorite treat in our household, especially for my kids. They absolutely adore making them, and I love seeing their faces light up with excitement as we assemble these delightful dirt desserts together. It’s a fun activity that we can all enjoy, and it’s a great way to bond as a family.
One of the great things about dirt pudding cups is that they’re so easy to make. Just like this festive Funfetti dip, you only need a few ingredients, and no baking is required. Easy desserts for the win!
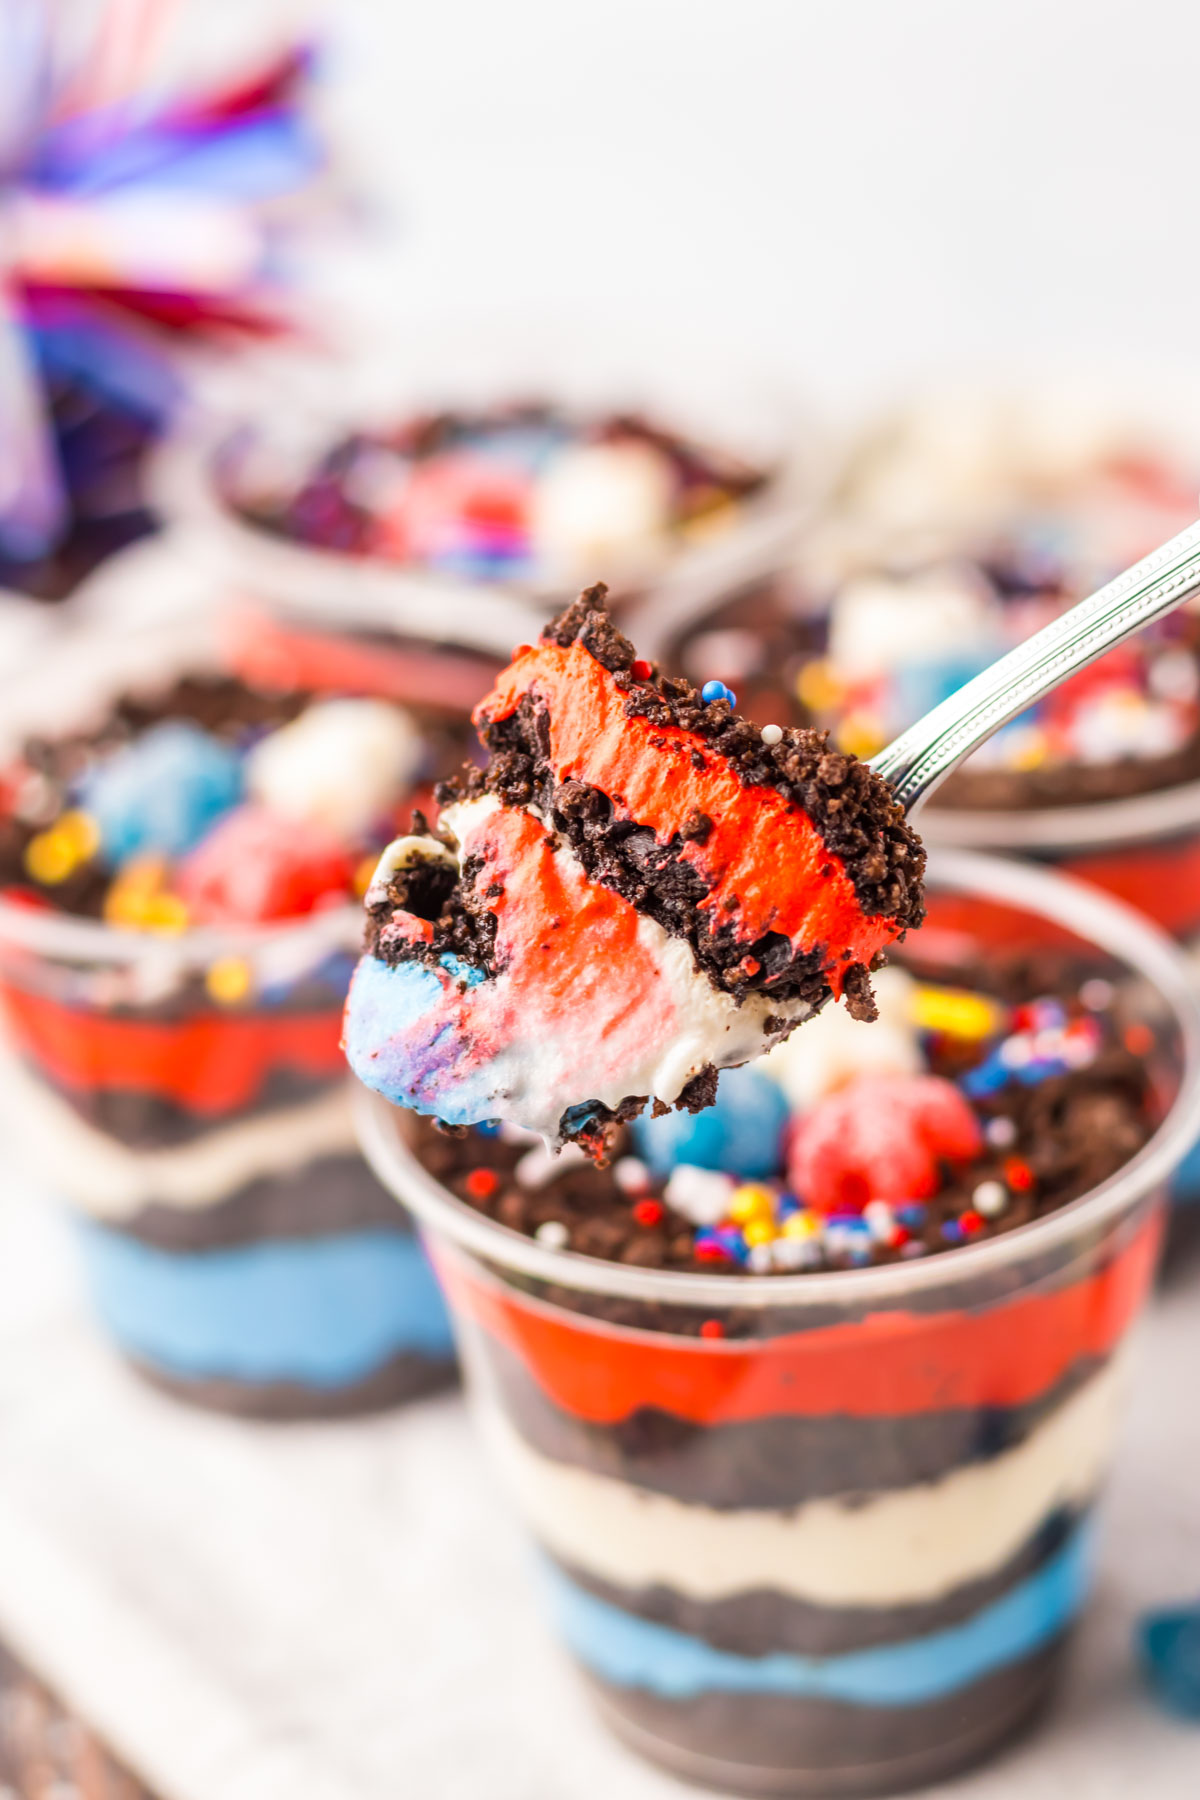
This recipe makes it easy for my kids to get involved, and they just looooove layering the pudding and cookie crumbs and, of course, getting to decorate their own cups with sprinkles and gummy stars.
Table of Contents
Pudding Dirt Cups
You can easily make these dirt cups with your favorite cookies and pudding flavor to serve them up all year round. We use different colors of sprinkles and candy to make springtime garden dirt cups, and spooky graveyard Halloween dirt cups are super fun. But I think these Oreo dirt cups are extra special because of their patriotic flare.
Yeap, these red, white, and blue dirt pudding desserts are just the thing for celebrating Memorial Day, Flag Day, Fourth of July, or just having a fun family gathering. Plus, they’re absolutely delicious! The combination of creamy pudding and crunchy cookie crumbs is simply irresistible, and my kids (and I) just can’t get enough of them.
Recipe Highlights
- No Baking Required – Dirt Cups require no baking, making them a great option for hot summer days when you don’t want to turn on the oven.
- A Kid Favorite – Kids love making and eating these layered desserts. It’s a fun and interactive activity that allows them to get creative in the kitchen.
- It’s Quick and Easy – With minimal preparation time and just a few simple ingredients, you can have a delicious dessert ready in no time.
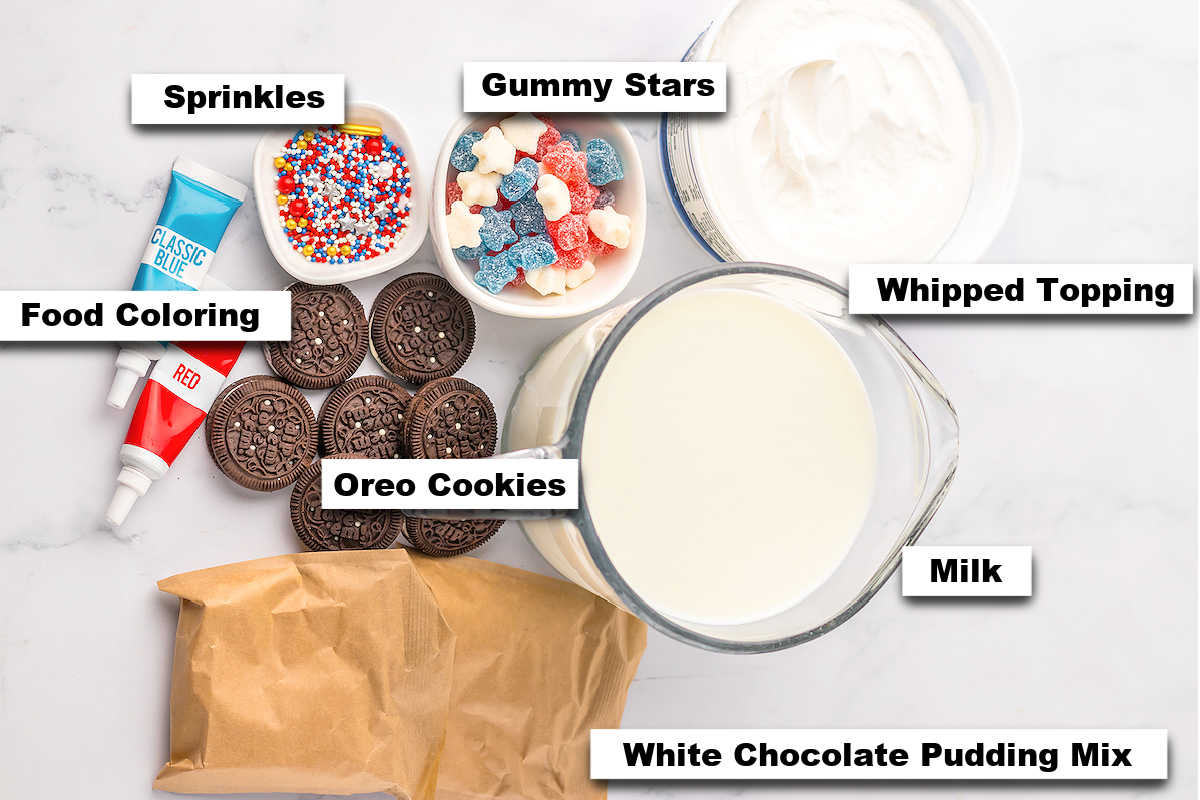
Ingredient Notes
- Chocolate Sandwich Cookies – Chocolate cookies, such as Oreos, are crushed to create the “dirt” in the dessert. You can use any chocolate sandwich cookies or even chocolate graham crackers as a substitute.
- Cold Milk – Milk is used to prepare the pudding. Whole or 2% milk is recommended. If non-dairy milk is required check the pudding package for changes to the recipe.
- Instant White Chocolate Pudding Mix – We use white chocolate pudding to make it easy to add coloring. You can also use vanilla pudding or cheesecake pudding.
- Whipped Topping: Cool Whip adds a light and fluffy texture to the pudding. If you prefer, you can use homemade whipped cream as a substitute.
- Festive Sprinkles – Red, white, and blue sprinkles give them patriotic flair, but you can use any type of sprinkles you like, or omit them altogether if you prefer.
- Gummy Stars – Dirt cups are traditionally made with gummy worms, but I used gummy stars to continue the patriotic theme. You can use any type of gummy candy or other decorations you prefer.
- Red and Blue Food Coloring – You can skip the food coloring, or use natural food coloring alternatives if desired.
Handy Tip: Use Good Kitchen Tools!
For the best tools to help make your recipe even easier and more successful, check out my collection of the Best Kitchen Tools on Amazon.
How To Make Dirt Cups
Get complete ingredients list and instructions from the recipe card further below.
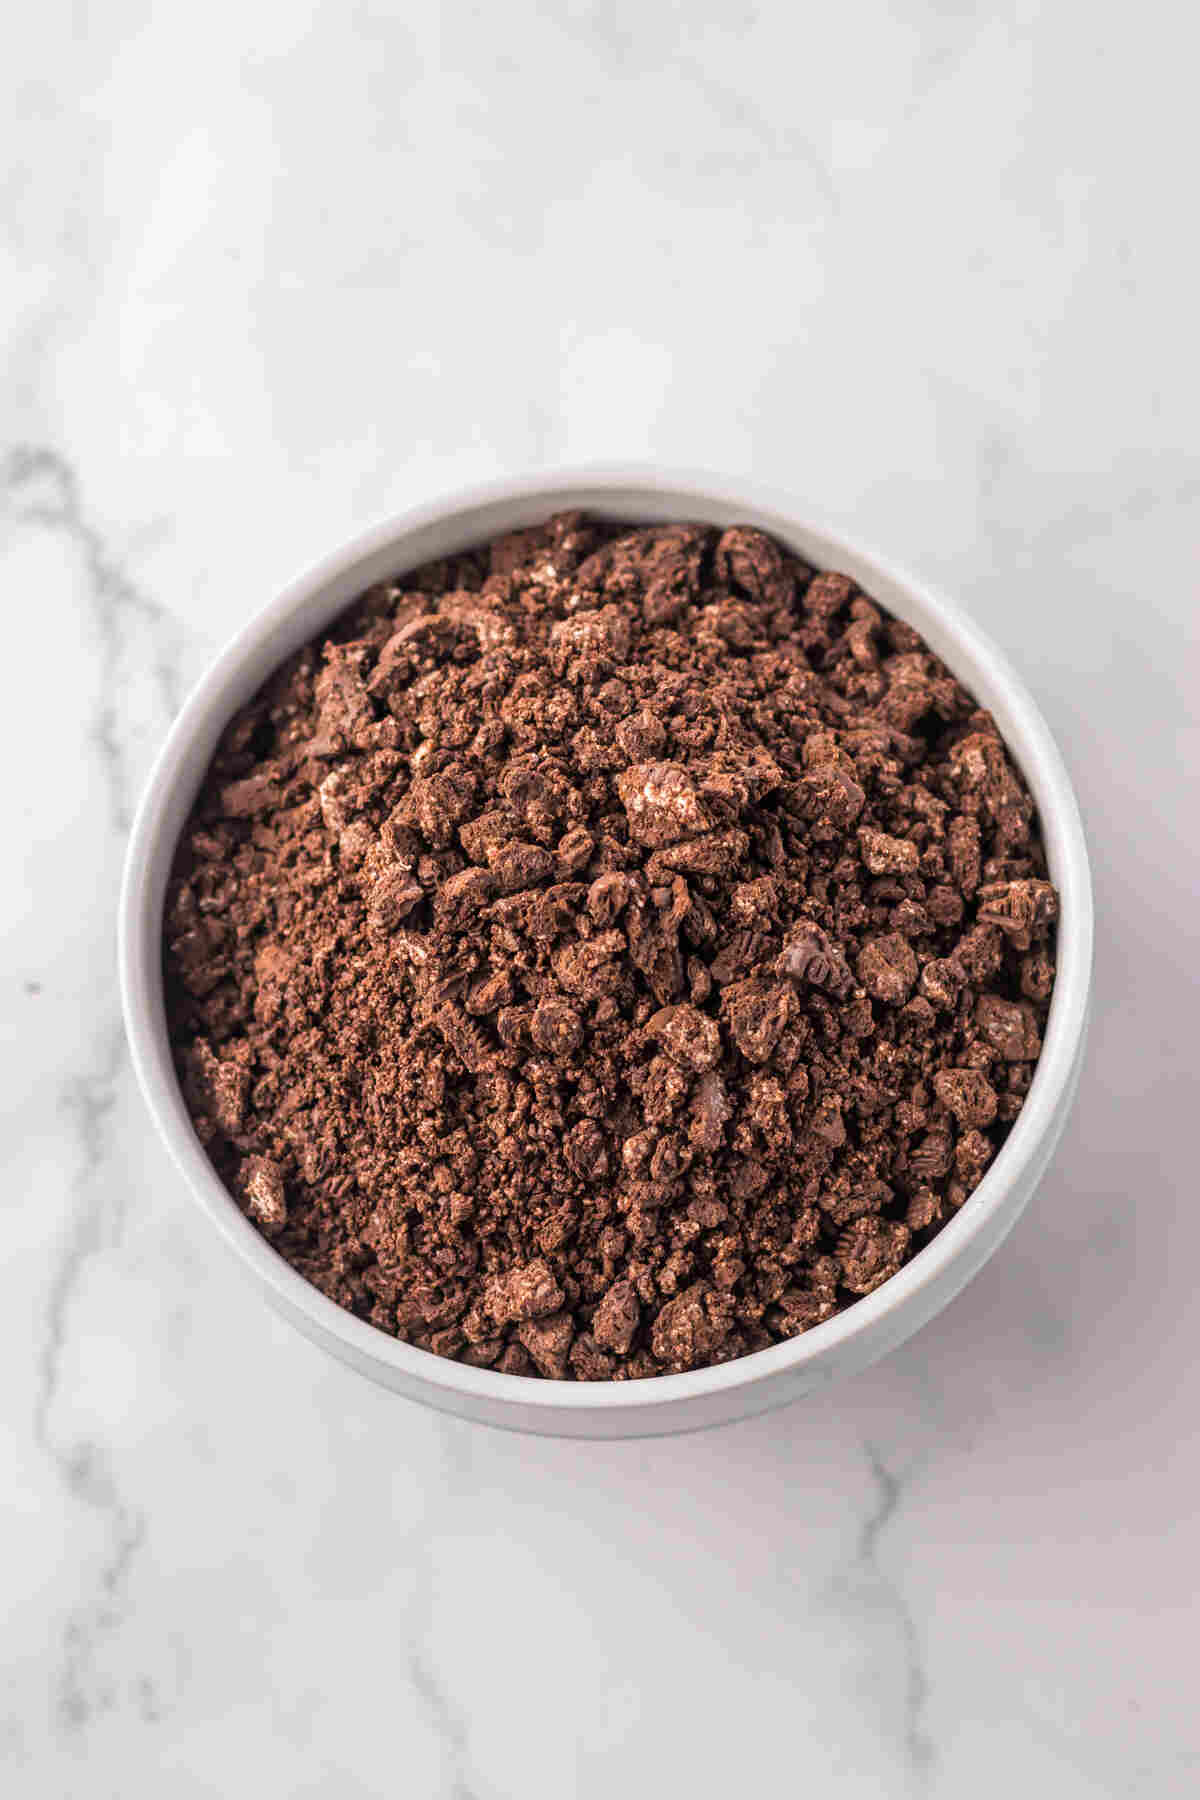
Step 1. Place the sandwich cookies into a food processor and mix until the cookies are crushed to a dirt-like consistency.
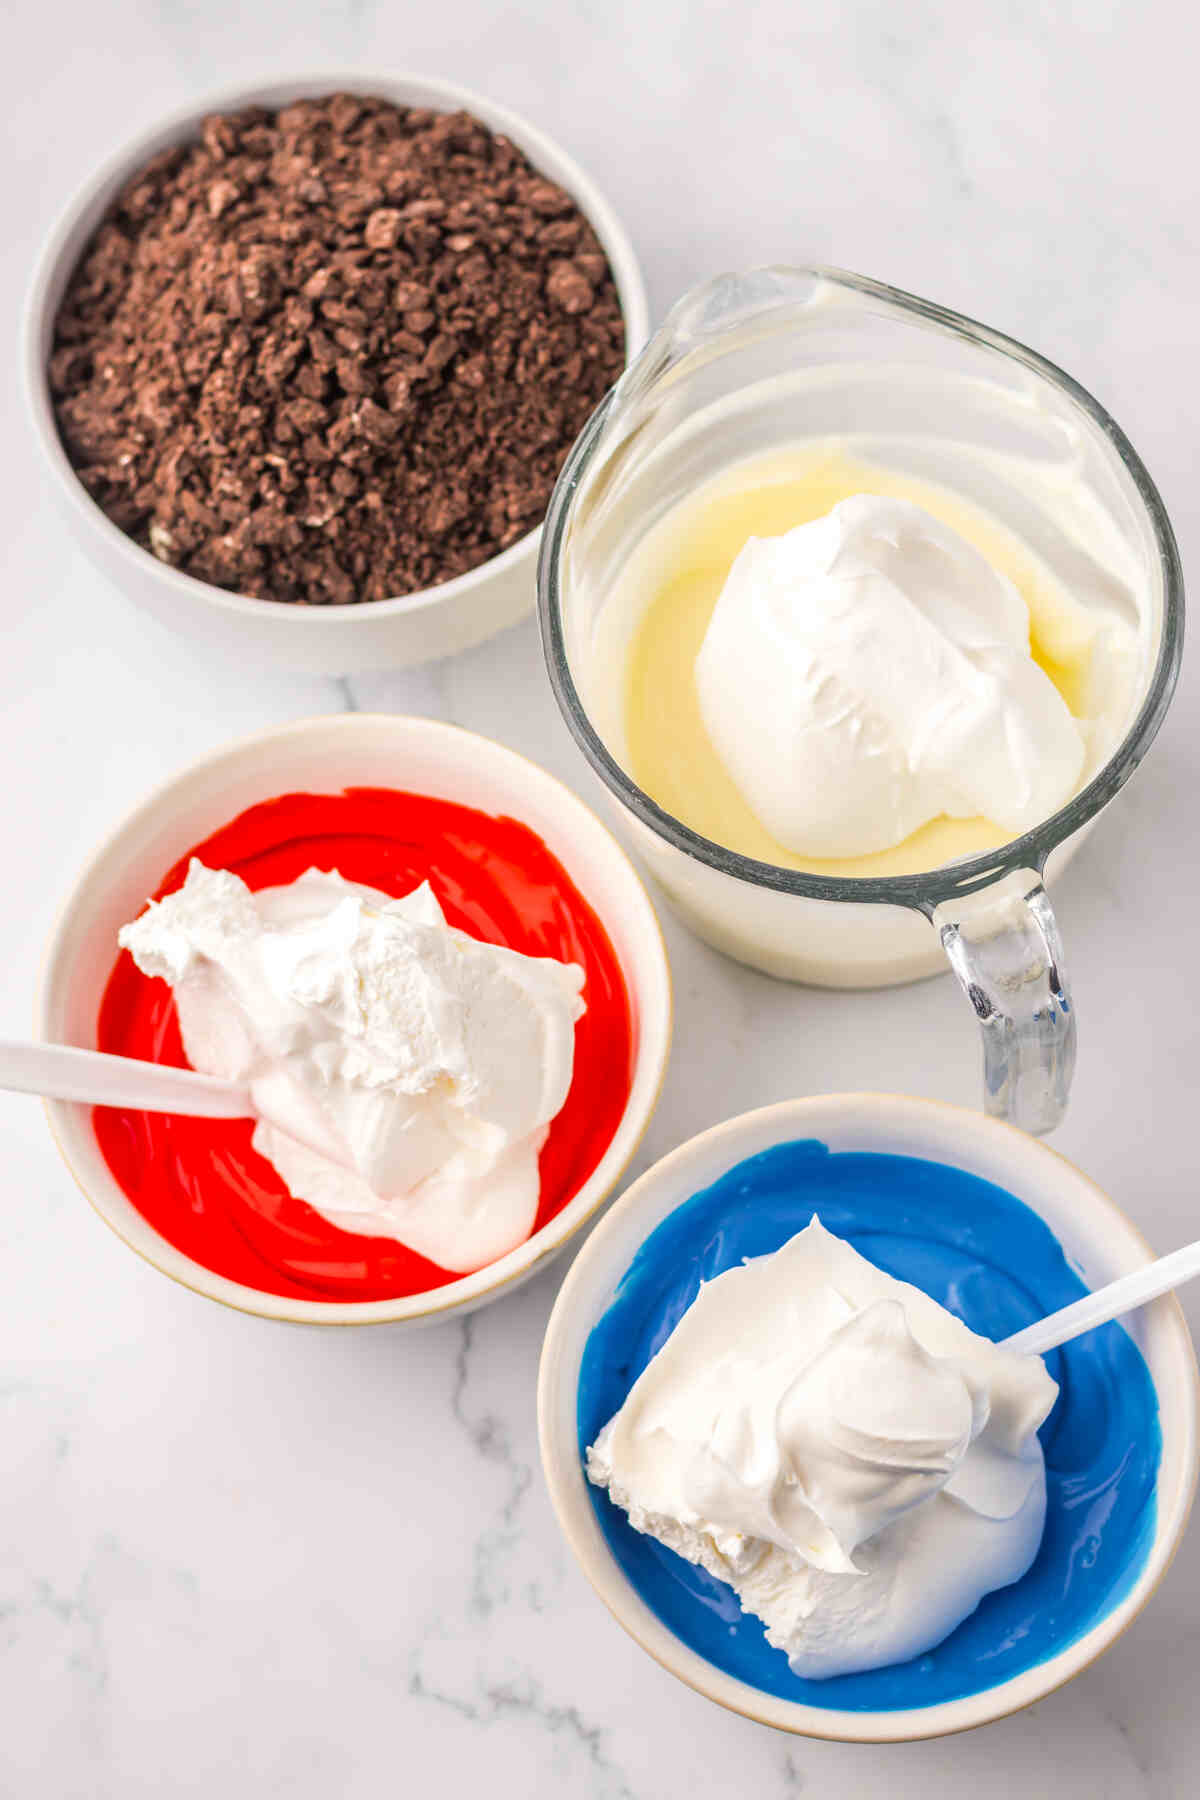
Step 2. In a large bowl, whisk together the milk and the pudding mix until smooth, then portion into three bowls. Add red food dye to one bowl, and blue food dye to another, and leave one bowl white. Divide the whipped topping between the pudding bowls and gently fold to incorporate.

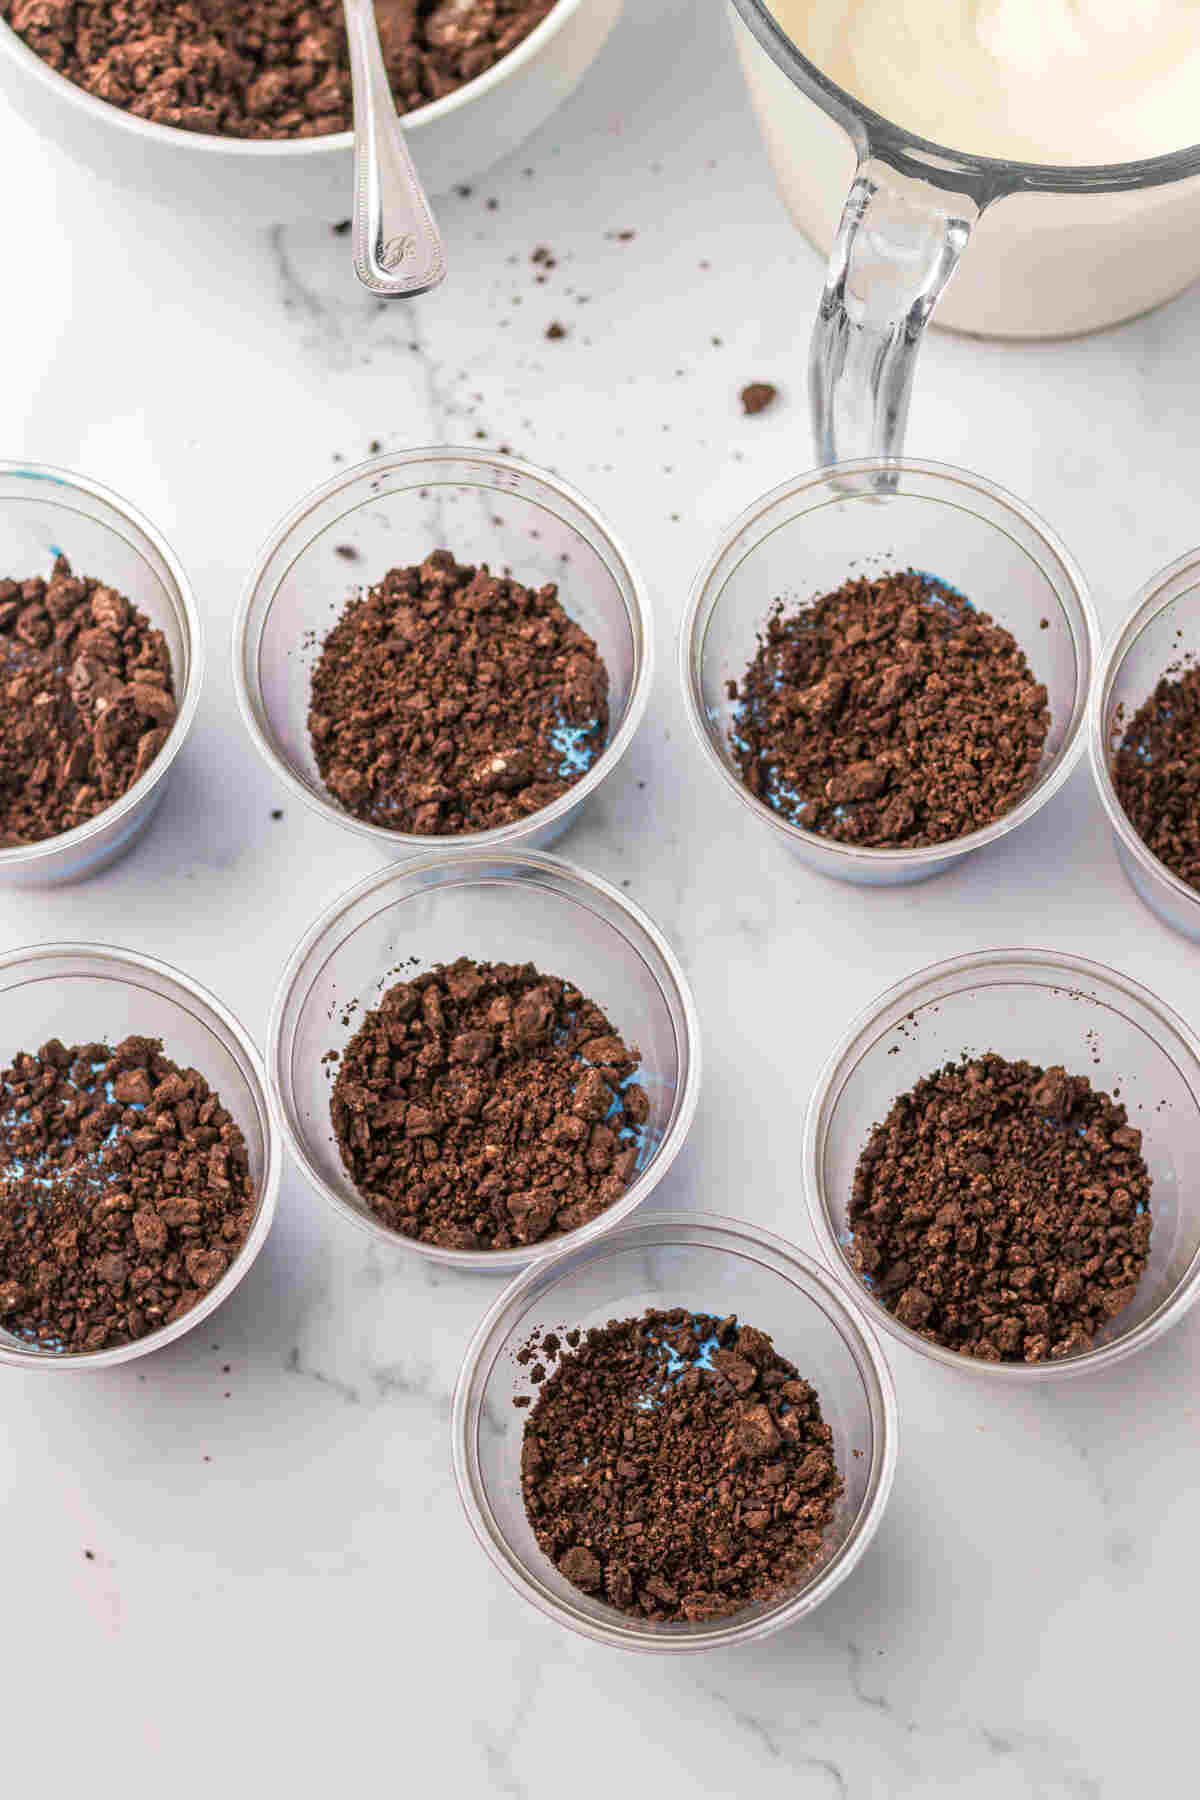
Step 3. Fill your serving cups by starting with a layer of cookie crumbs.

Step 4. Then add in the blue pudding and layer on more of the crumbled cookies.
Step 5. Top with the white pudding, then add more of the cookie crumbs.
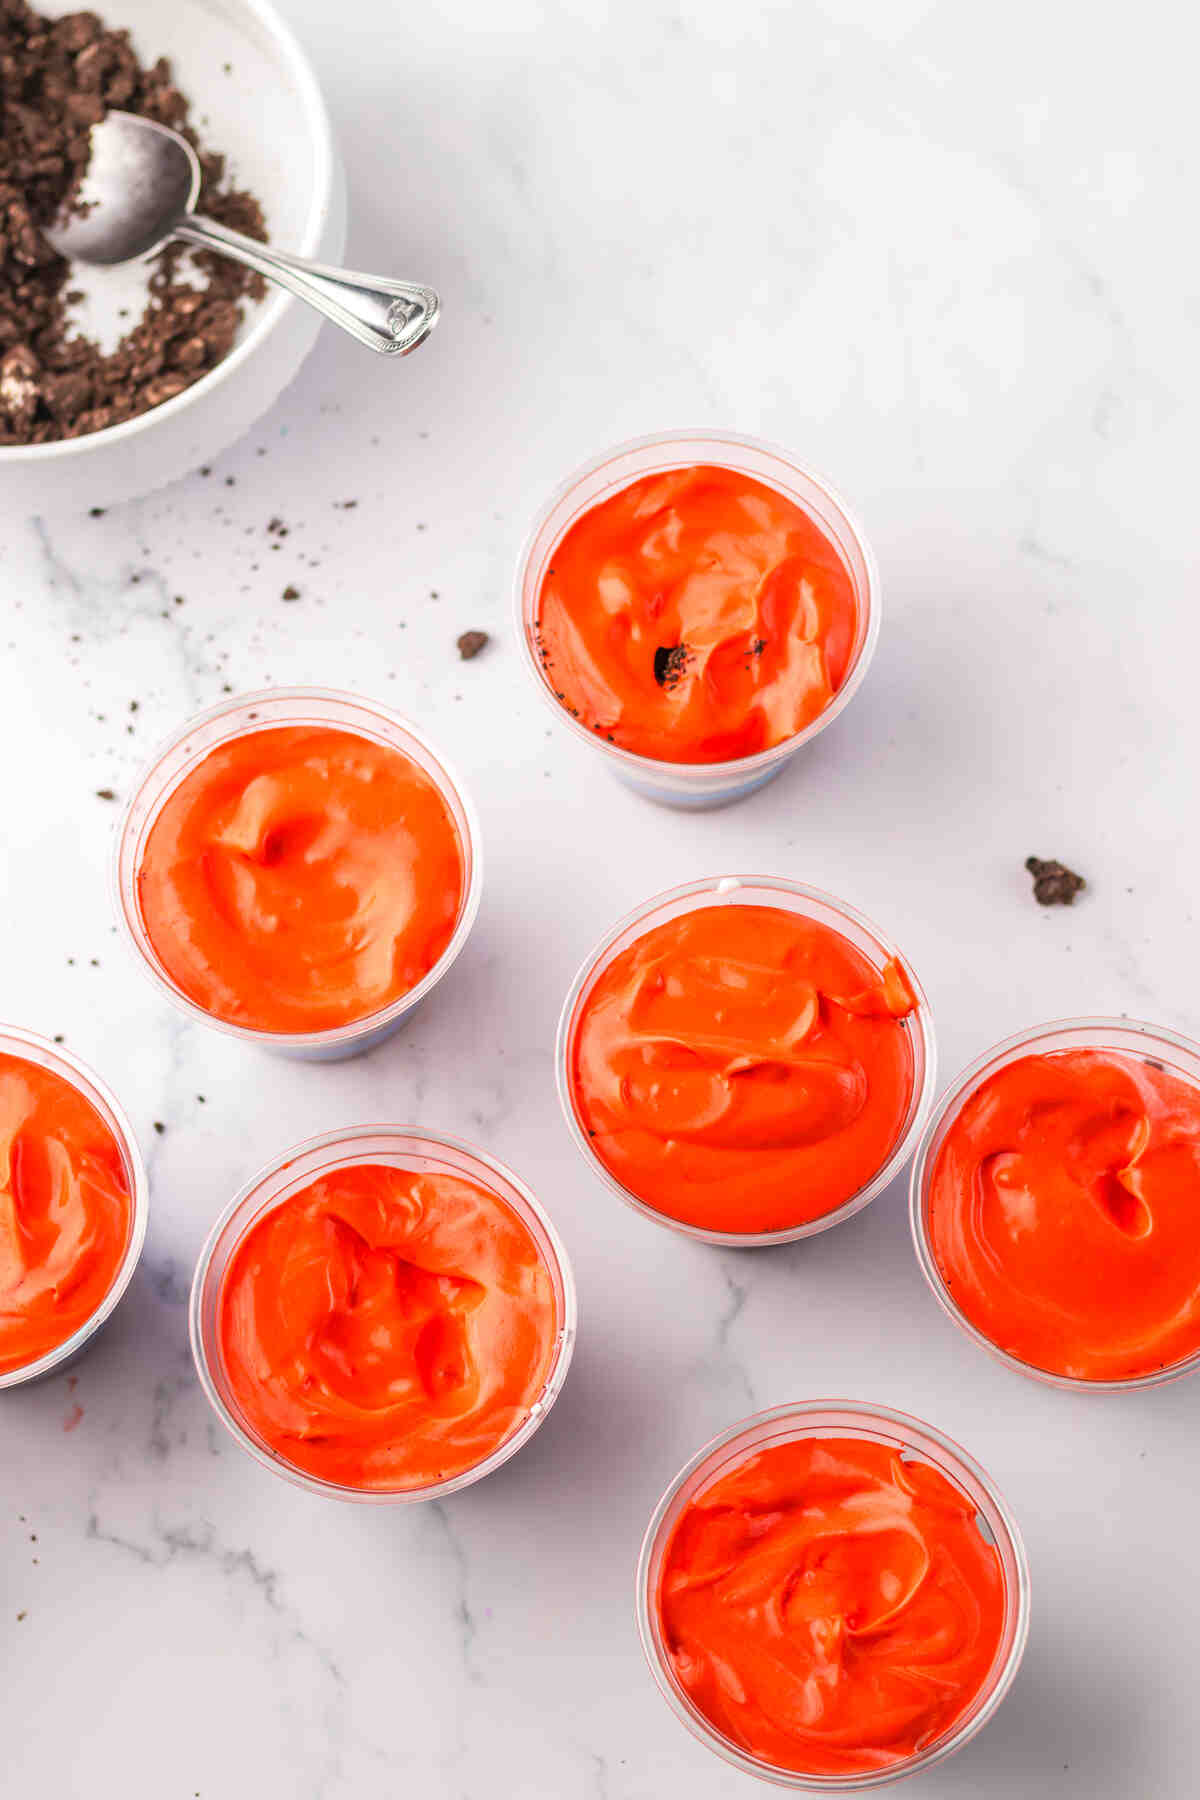
Step 6. Next, add a layer of the red pudding.
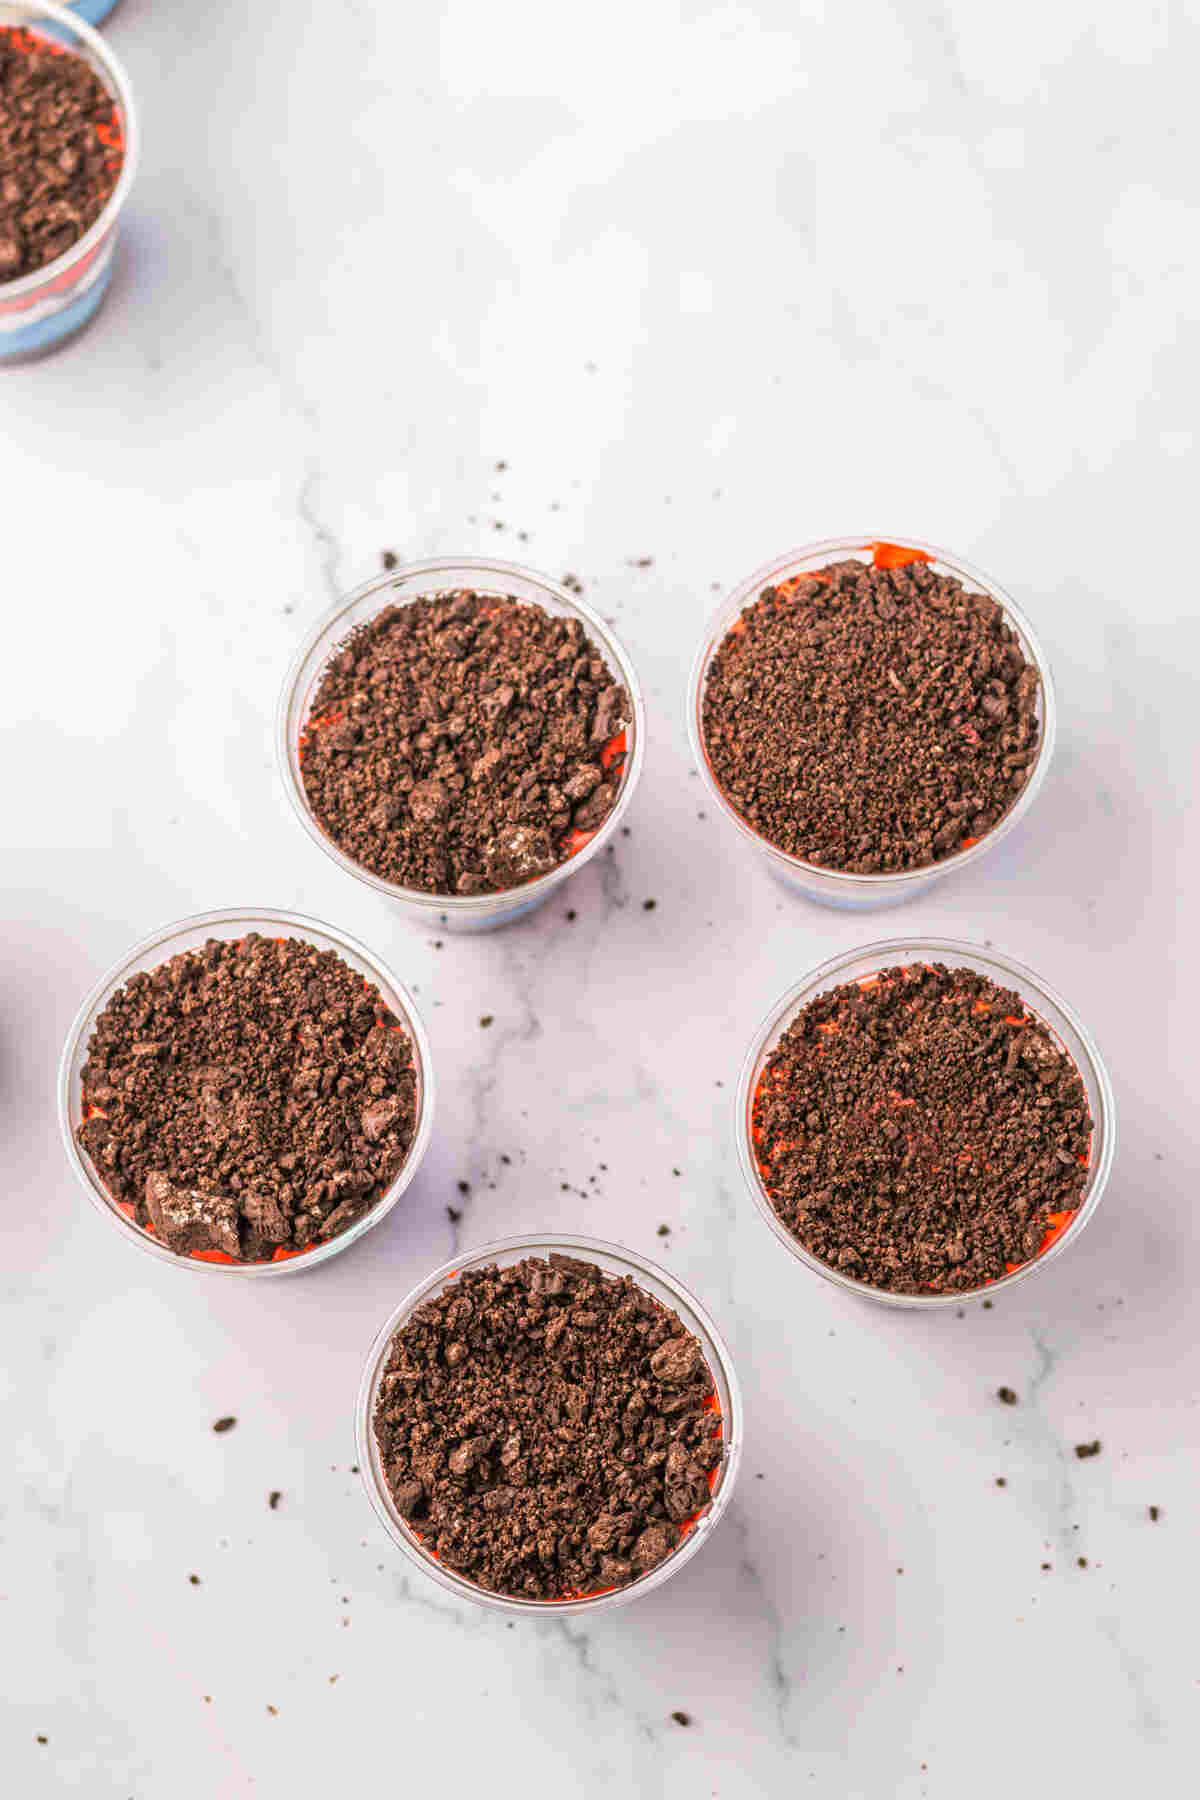
Step 7. Finish the cups with a final layer of cookie crumbs.
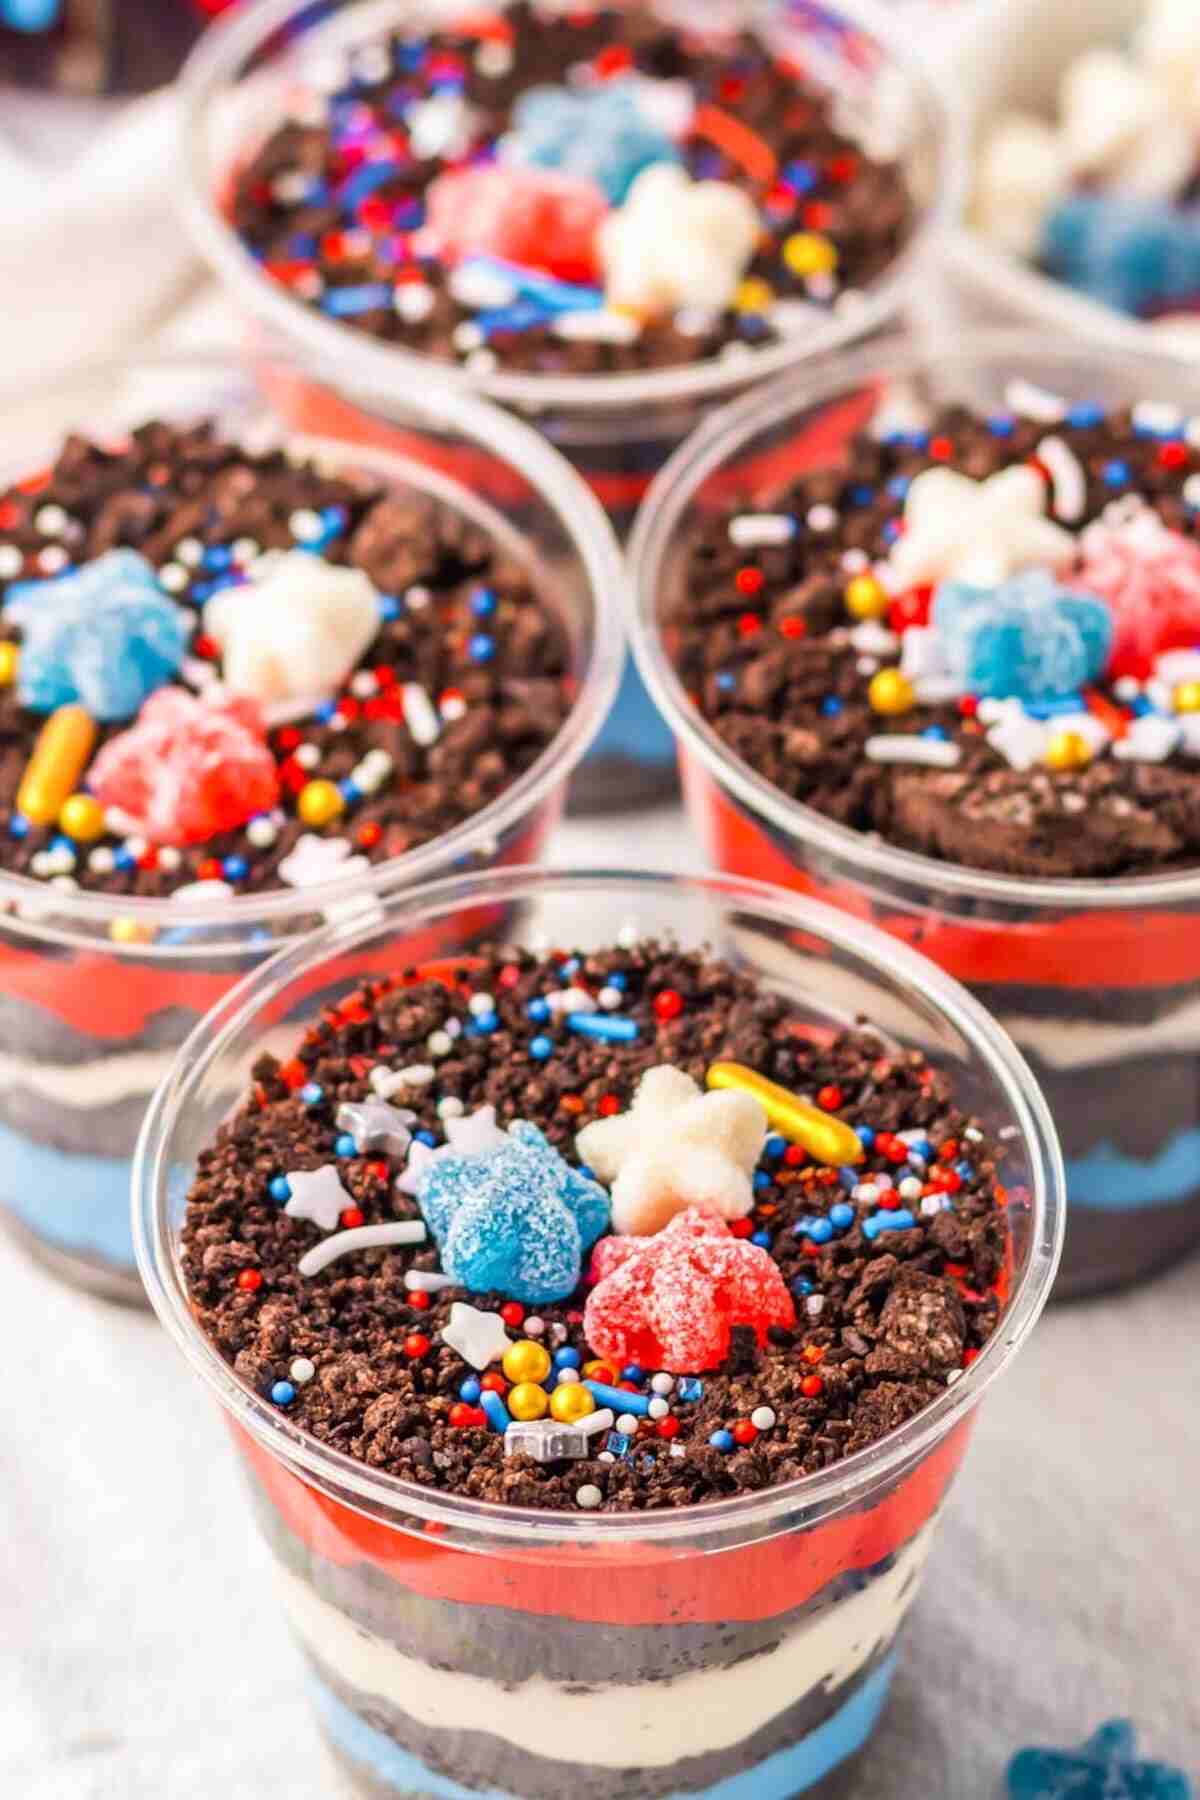
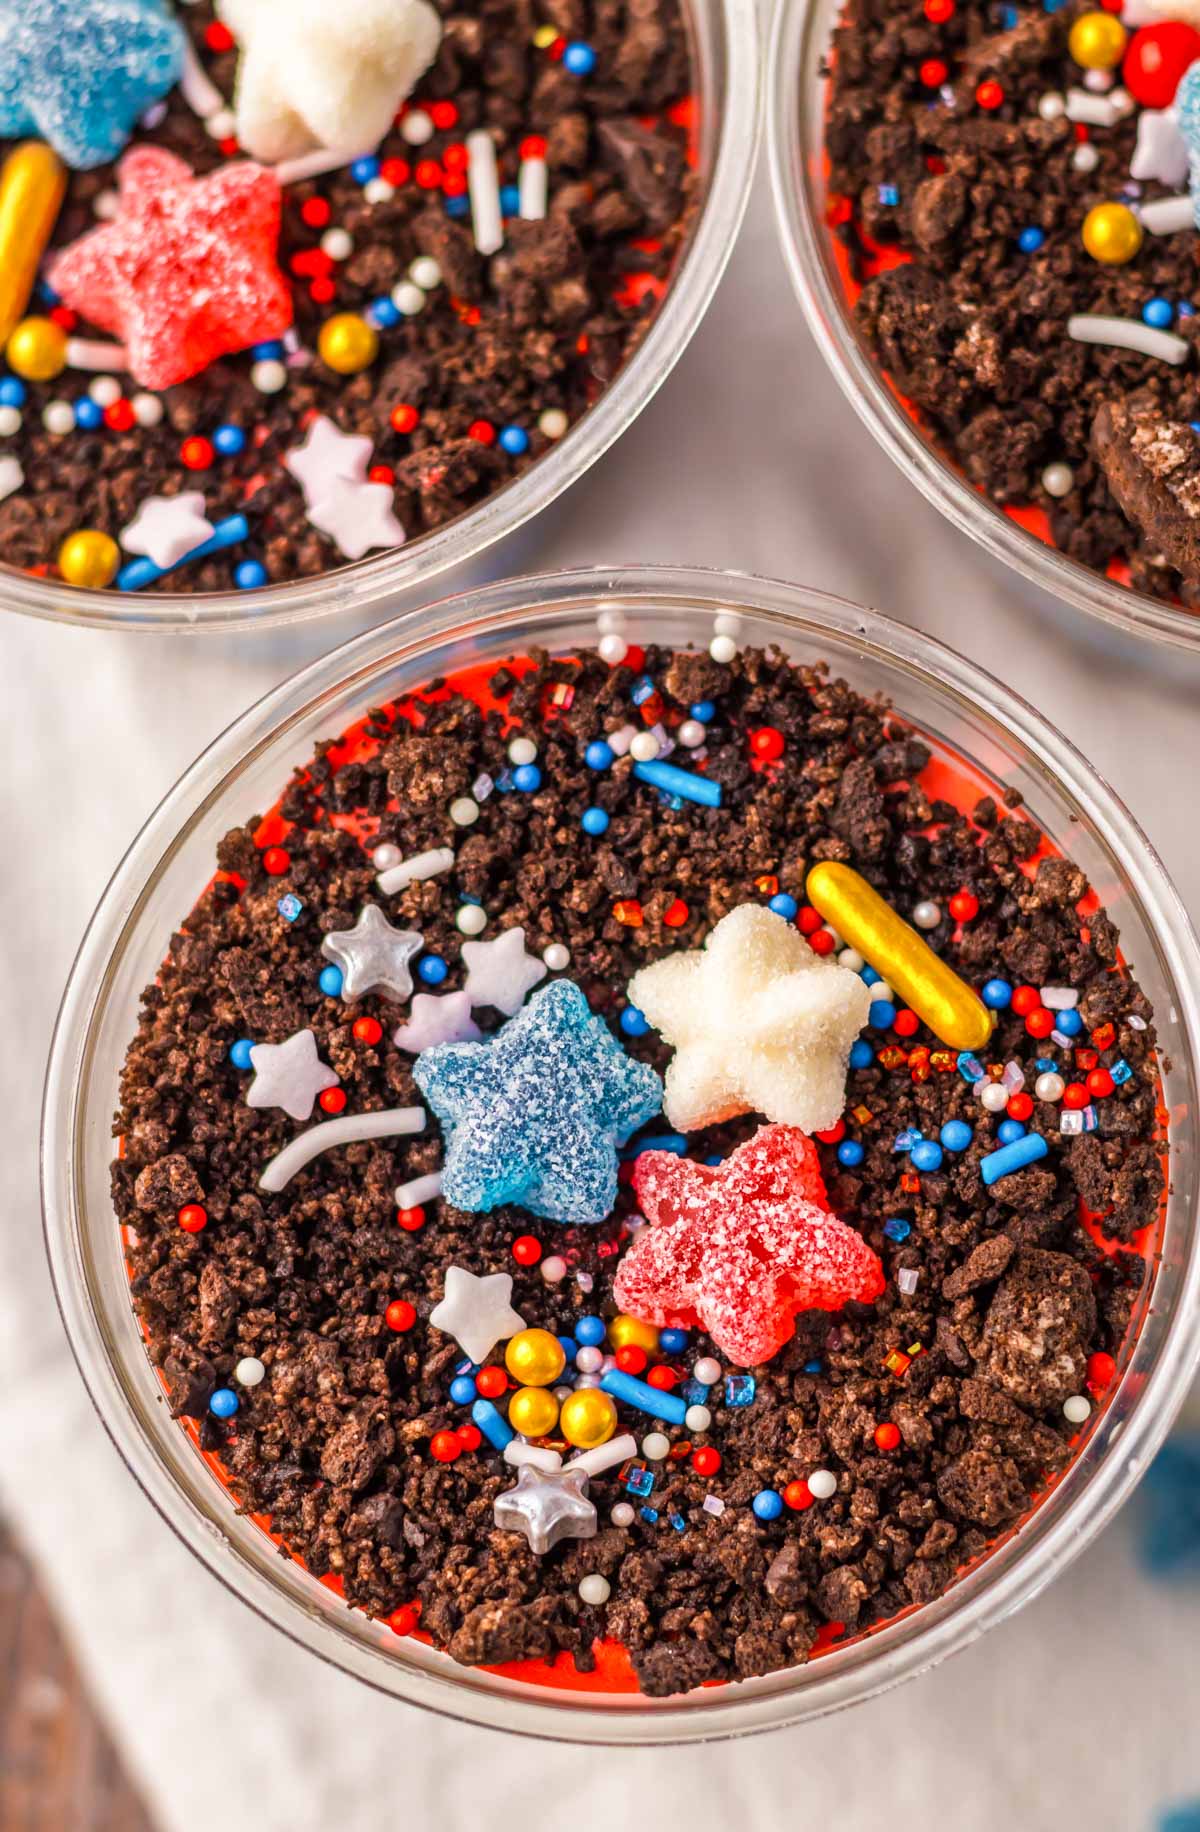
Step 8. Garnish each dessert cup with sprinkles and gummy stars just before serving.
Pro Tips
- Use a food processor or place the cookies in a plastic bag and crush them with a rolling pin until they are finely ground. This will give you the perfect “dirt” texture for your dessert.
- When layering the Oreo dirt and pudding, press down gently on the crushed Oreos with a spoon to compact the layers.
- If time allows, chill in the refrigerator for at least 30 minutes before serving. This will allow the pudding to set and the flavors to meld together for a better taste and texture.
- Have fun decorating your dirt cups with festive sprinkles, gummy stars, or other decorations. Let your imagination run wild!
- You can prepare the Pudding dirt cups several hours or even a day in advance. Simply cover them with plastic wrap and store them in the refrigerator until you’re ready to serve, but don’t add the sprinkles and gummy stars until just before serving.
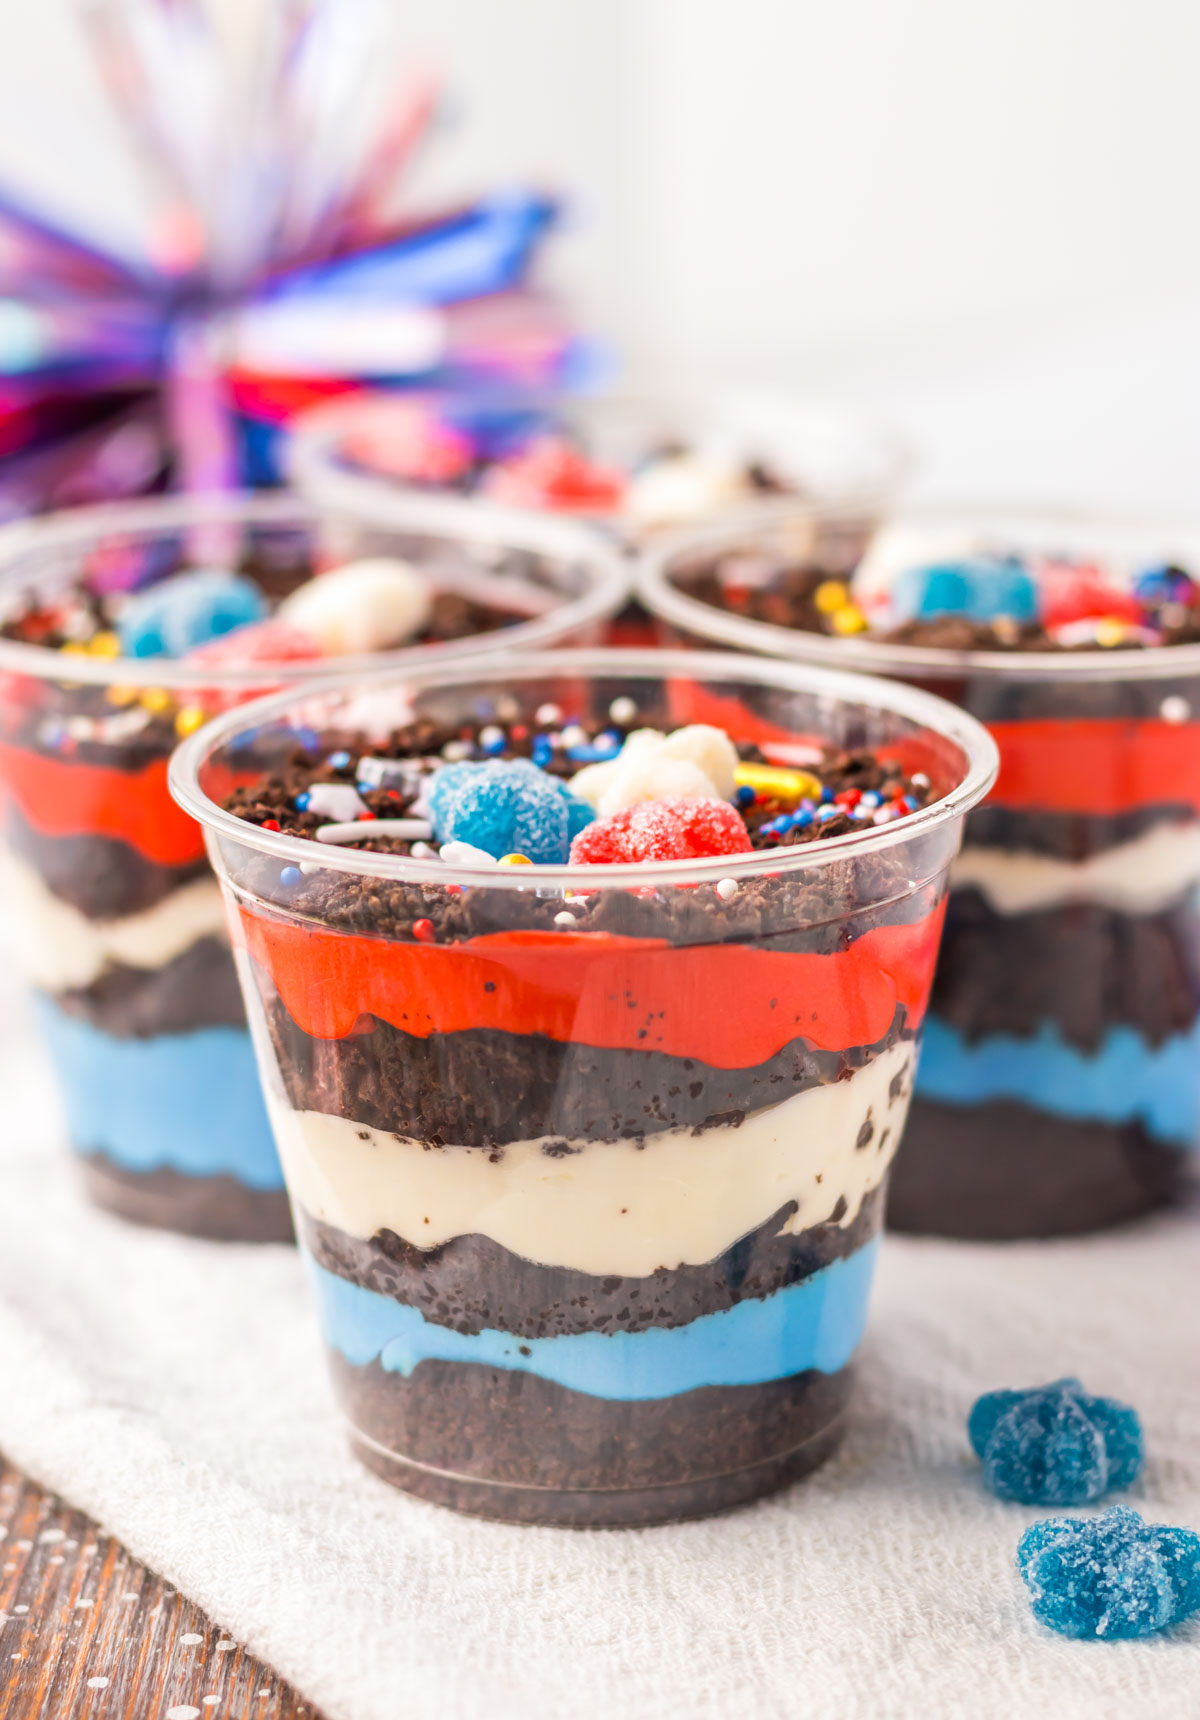
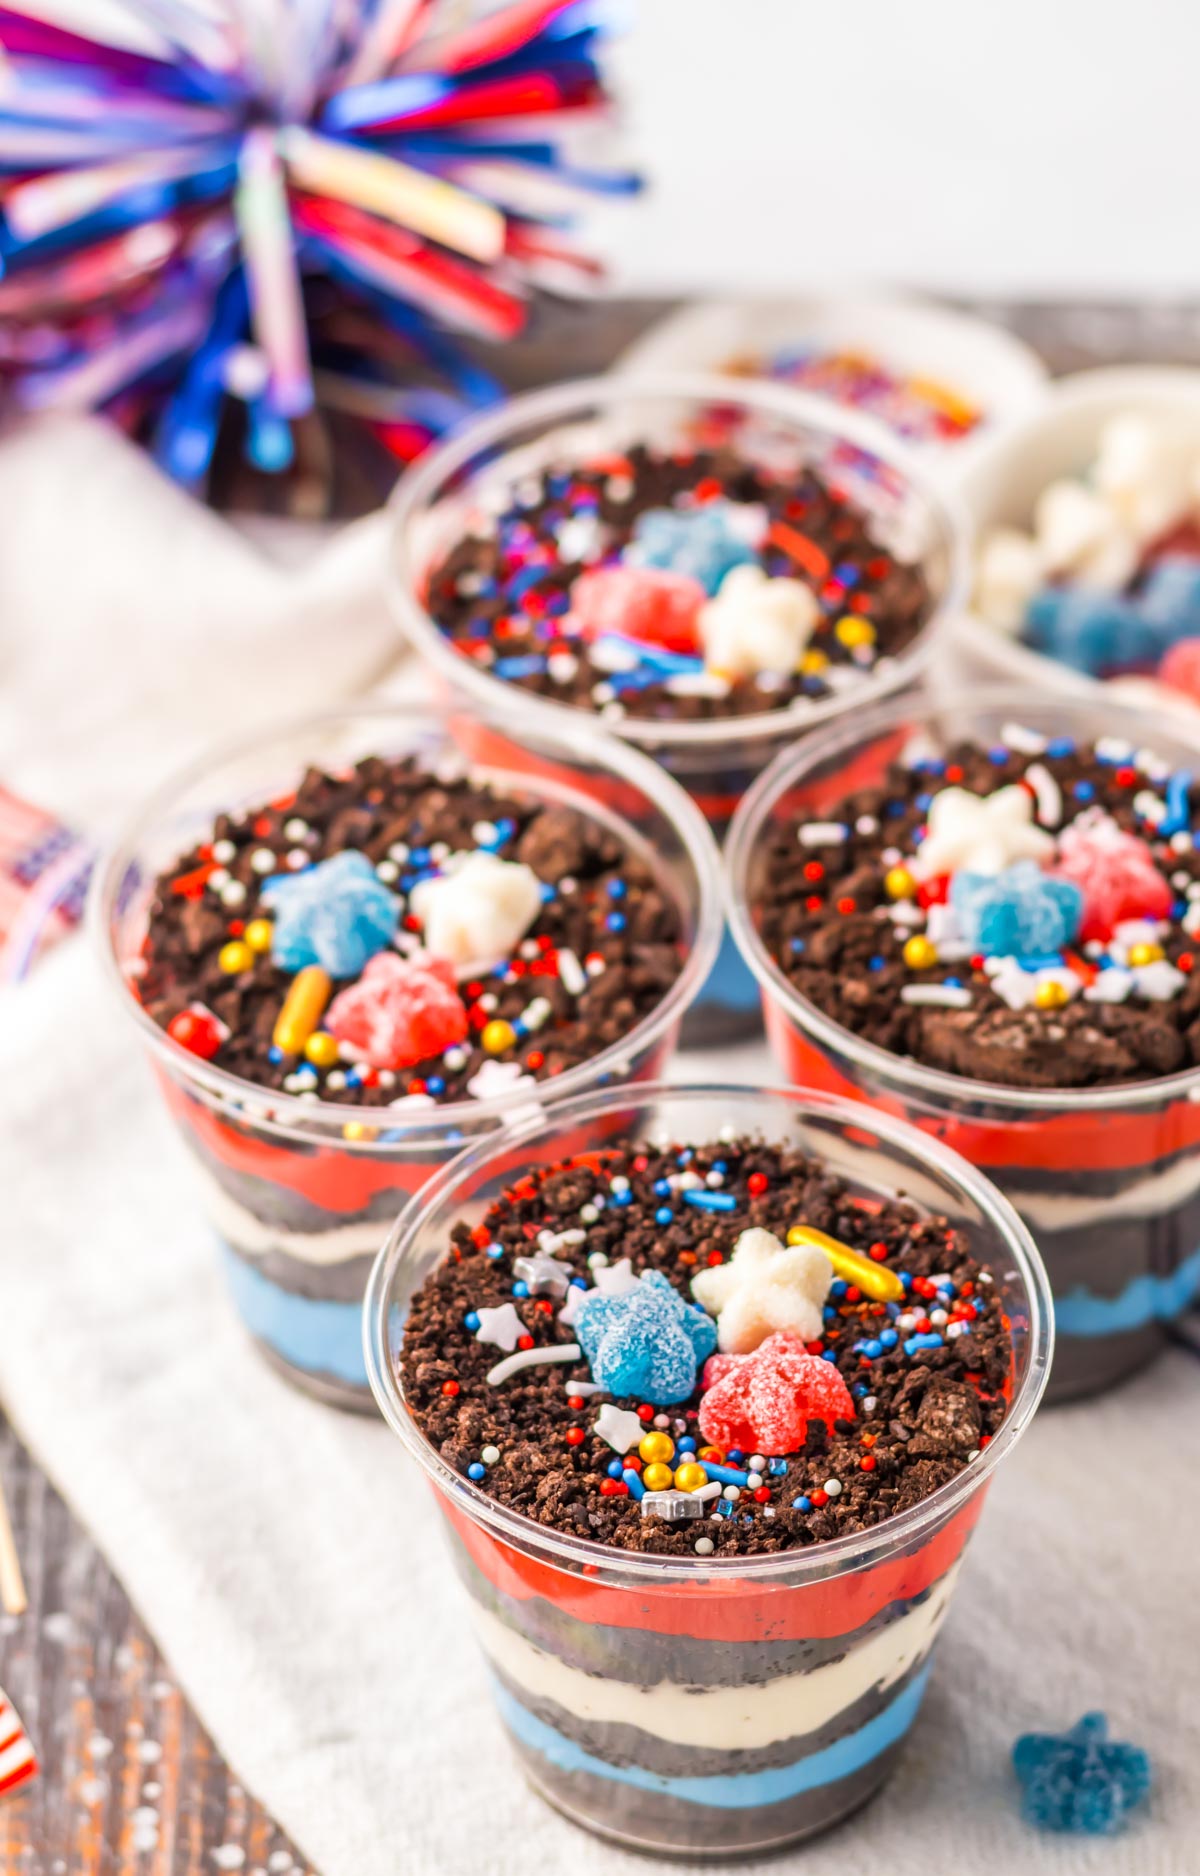
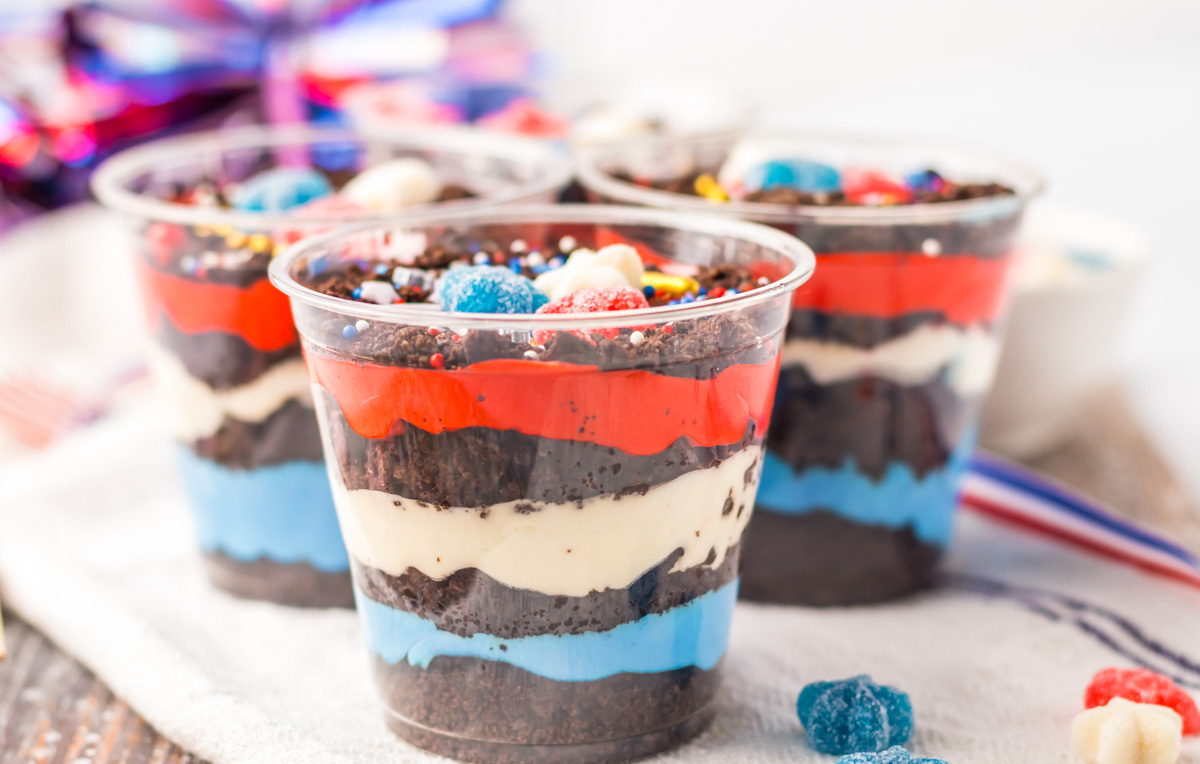
- Serving the dirt cups in clear cups allows you to see the layers and makes for a fun presentation.
Delicious Variations
- Swap the Pudding – You can make these with any flavor of pudding that you like.
- Swap the Cookies – Oreo cookies come in a myriad of flavors. Easily transform the flavor of this dirt dessert by using flavored cookies.
- Swap the Toppings – Swap the sprinkles and gummy stars for your favorite gummy topping.
Prep And Storage
- Prep Ahead – Prepare up to 24 hours in advance.
- Store – Cover the dirt cups with plastic wrap and store in the fridge for up to 3 days.
- Freeze – Freezing is not recommended.
FAQs
Yes, you can use different flavors of pudding to make dirt cups. Using vanilla instead of white chocolate, for example, works when adding the colors to make these patriotic dirt cups. You can also use other flavors to make colorful layers without food coloring.
Make these up to 24 hours in advance. Cover and store in the fridge. Top with sprinkles and gummy stars just before serving.
Food coloring is entirely optional. You can use natural colorings or omit the coloring altogether.
Similar Recipes
- Patriotic Funfetti Dip.
- Easy Red White and Blue Trifle.
- Patriotic Chocolate Covered Pretzels.
Serve With:
- Hosting a Memorial Day barbecue or 4th of July bash? Serve these alongside any of my Memorial Day recipes and these 35 4th of July recipes.
- For a classic kid-friendly meal, pair them with baked chicken tenders and Air Fryer French Fries.
- Wash these tasty treats down with a refreshing glass of Fresh peach lemonade.
Recommended Tools
- A food processor to create the cookie crumbs.
- A set of mixing bowls for creating the different colors of pudding.
- For the best tools to help make your recipe even easier and more successful, check out my collection of the Best Kitchen Tools on Amazon.
Thank you for reading my dirt pudding dessert cups recipe post. And please come visit again as I continue to slice, dice and dream up affordable Air Fryer recipes, Instant Pot recipes, Southern Recipes, and more. Thanks for supporting Recipes from a Pantry, food blog.
Get the Quick and Easy Dirt Cups Recipe
Don’t forget to tag #recipesfromapantry on Instagram or Twitter if you try Dirt Cups! It is really, really awesome for me when you make one of my recipes and I’d love to see it. You can also share it on my Facebook page. Please pin this recipe to Pinterest too! Thank you for reading Recipes from a Pantry.
Dirt Cups
Ingredients
- 13.29 ounces (377g) chocolate sandwich cookies such as Oreos
- 4 cups (946ml) cold milk
- 6.8 ounces (192g) instant white chocolate pudding mix two 3.4-ounce boxes
- 8 ounces (226g) whipped topping thawed
- red and blue food coloring
- festive sprinkles
- gummy stars
Instructions
- Place the sandwich cookies into a food processor and mix until the cookies are crushed to a dirt-like consistency.
- Prepare the pudding in a large bowl by whisking together milk and pudding mix until smooth.
- Portion out the pudding equally into three bowls. Add red food dye to one bowl, add blue food dye to another, and leave one bowl white.
- Divide the whipped topping between the pudding bowls and gently fold to incorporate.
- Fill your serving cups by layering cookie crumbs, blue pudding, cookie crumbs, white pudding, cookie crumbs, red pudding, and then finishing with a final layer of cookie crumbs.
- Top each dessert cup with sprinkles and gummy stars just before serving.
Video
Notes
- Use a food processor or place the cookies in a plastic bag and crush them with a rolling pin until they are finely ground. This will give you the perfect “dirt” texture for your dessert.
- When layering the cookie crumbs and pudding, press down gently with a spoon to compact the layers.
- If time allows, chill in the refrigerator for at least 30 minutes before serving. This will allow the pudding to set and the flavors to meld together for a better taste and texture.
- Have fun decorating your dirt cups with festive sprinkles, gummy stars, or other decorations. Let your imagination run wild!
- Serving the dirt cups in clear cups allows you to see the layers and makes for a fun presentation
- Storage – You can prepare the dirt cups several hours or even a day in advance. Simply cover them with plastic wrap and store them in the refrigerator until you’re ready to serve. Be sure not to add sprinkles and the gummy stars until you’re ready to serve.